Want to know how to restring your tennis racket? Our step-by-step guide covers everything from preparing the racket to finishing touches. Get ready to ace your game!
Preparing the Racket for Restringing
Are you tired of playing with a racket that has lost its grip? Do you want to improve your game with a racket that has the right tension and strings? Restringing your racket is the solution, and it’s not as complicated as you might think.
Removing the Old Strings
Before starting, you need to remove the old strings. This step is crucial because it allows you to clean the racket frame and check for any damages. To remove the old strings, follow these steps:
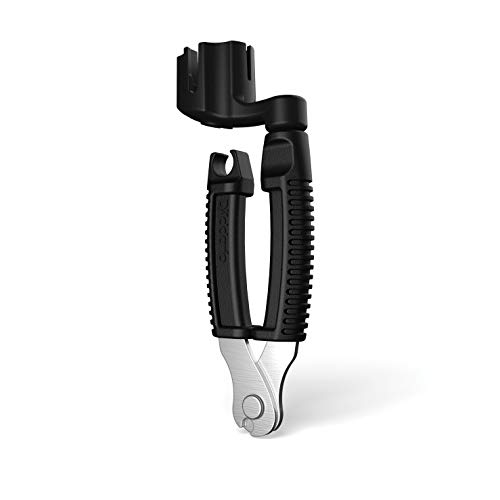
- Use a string cutter to cut the strings near the frame.
- Use a string puller to unwind the strings from the racket frame.
- Remove any remaining strings from the frame with your fingers or pliers.
Cleaning the Racket Frame
Once you’ve removed the old strings, it’s time to clean the racket frame. Cleaning the frame is essential because it removes any dirt, sweat, or debris that might have accumulated over time. To clean the racket frame, follow these steps:
- Use a damp cloth to wipe the frame gently.
- Use a toothbrush or soft-bristled brush to clean hard-to-reach areas.
- Let the frame dry for a few minutes before moving to the next step.
By removing the old strings and cleaning the racket frame, you’ve prepared your racket for the next step: choosing the right string and tension.
Choosing the Right String and Tension
Choosing the right string and tension for your racket can make all the difference in your game. With so many types of strings and tensions available, it can be overwhelming to make the right choice. In this section, we will discuss the different types of strings and how to determine the right tension for your playing style.
Types of Strings
The type of string you choose can affect your game in multiple ways. Here are the most common types of strings and their characteristics:
- Natural Gut: Natural gut strings are made from the intestines of cows or sheep. They are known for their comfort, power, and feel, but are also the most expensive type of string.
- Nylon: Nylon strings are the most popular choice among players. They are affordable, durable, and provide a good balance of power and control.
- Polyester: Polyester strings are popular among advanced players for their control and spin. They are less comfortable than other types of strings, but are more durable.
- Hybrid: Hybrid strings are a combination of two different types of strings. They can provide the benefits of each type of string, but can also be more expensive.
Determining the Right Tension
The tension of your strings can also affect your game. Higher string tension provides more control, while lower tension provides more power. Here are some factors to consider when determining the right tension for your game:
- Playing style: If you are an aggressive player who hits hard, higher tension may be better for you. If you are a finesse player who relies on touch and placement, lower tension may be better.
- Racket type: Different rackets may require different string tensions. Check your racket manufacturer’s recommendations for string tension.
- Personal preference: Ultimately, the best tension for you is the one that feels the most comfortable and provides the best performance.
Restringing the Racket
Restringing your racket is an essential part of maintaining good performance on the court. It’s important to know how to string your racket properly so that it’s strung to your desired tension and with the right type of string. Here are some steps to help you restring your racket like a pro.
Stringing the Main Strings
The first step in restringing your racket is to string the main strings. Start by clamping the racket frame into the stringing machine. Next, insert the first main string into the bottom of the racket head and pull it up towards the top of the frame. Make sure to weave the string over and under the cross strings in a consistent pattern. Once you’ve reached the top of the frame, tie off the string with a knot and clamp it in place.

Repeat this process for each main string, making sure to maintain the same tension and pattern as you go. It’s important to be consistent with your tension and pattern to ensure that your racket is strung evenly, which will give you the best possible performance on the court.
Stringing the Cross Strings
Once you’ve strung all the main strings, it’s time to move on to the cross strings. Start by inserting the first cross string into the racket head and pulling it across the main strings in a consistent pattern. Again, make sure to weave the string over and under the main strings in a consistent pattern to ensure even tension.
Once you’ve strung all the cross strings, tie off the string with a knot and clamp it in place. Make sure to cut off any excess string to avoid any interference with your play.
It’s important to note that there are different types of strings available, each with their own unique characteristics. Some strings may offer more power, while others may offer more control or durability. Consider your playing style and preferences when choosing the right type of string for your racket.
In addition, it’s important to determine the right tension for your racket. A higher tension will provide more control and precision, while a lower tension will offer more power and comfort. Experiment with different tensions to find the right one for your style of play.

Finishing Touches
Once you’ve strung your racket, there are a few finishing touches you need to make to ensure that your strings are secure and won’t come loose during play. In this section, we’ll cover knotting and clamping the strings, as well as cutting any excess strings.
Knotting and Clamping the Strings
After you’ve strung your racket, you need to knot and clamp the strings to ensure that they don’t come loose. Here’s how to do it:
- Tie a knot at the bottom of the racket where the strings start. This knot will prevent the strings from sliding out of place.
- Clamp the strings to the frame of the racket using a string clamp. This will hold the strings in place while you tie the knots.
- Tie knots at the top and bottom of each string. To do this, loop the string around itself and tie a knot. Make sure the knot is tight and secure.
Once you’ve tied the knots, you can remove the string clamp and move on to cutting the excess strings.
Cutting the Excess Strings
After you’ve tied the knots, you’ll be left with excess string that needs to be trimmed. Here’s how to do it:
- Use a pair of string cutters to trim the excess string. Be careful not to cut any strings that you need.
- Cut the strings close to the knot so that there isn’t too much excess left over. This will prevent the strings from getting in the way during play.
Once you’ve trimmed the excess, you’re ready to play with your newly strung racket!

In conclusion, knotting and clamping the strings, as well as cutting the excess strings, are important finishing touches to ensure that your racket is ready for play. By following these steps, you can be sure that your strings will stay in place and won’t come loose during a game. So go out there and play your best game yet!