Get ready to hit the court with confidence! Our guide covers everything you need to know about setting up and maintaining a tennis net, from required equipment and choosing the right location to helpful tips and tricks.
Required Equipment for Setting up a Tennis Net
Tennis is a popular sport that can be played by anyone, anywhere. Whether you are a seasoned pro or a beginner, setting up a tennis net is an essential part of playing the game. To do this, you will need some . In this section, we will discuss the required for setting up a tennis net.
Tennis Net
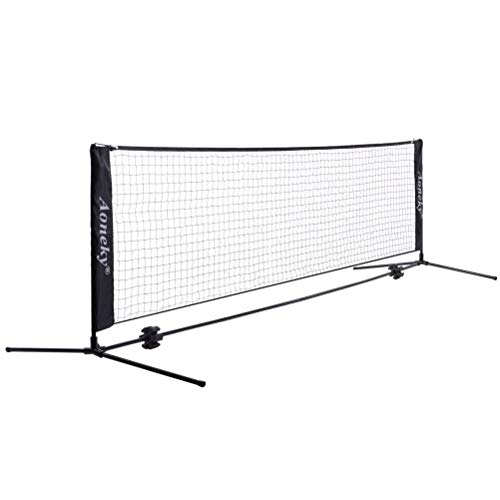
The first piece of equipment you will need is a tennis net. Tennis nets come in different sizes, so make sure you choose one that is appropriate for your court. The standard size for a tennis net is 42 feet long and 3 feet 6 inches high. However, there are also smaller nets available for junior players or smaller courts. When choosing a tennis net, look for one that is made of durable materials that can withstand outdoor weather conditions.
Tennis Posts
The next piece of equipment you will need is tennis posts. Tennis posts are used to hold the net up and keep it taut. When choosing tennis posts, look for ones that are made of sturdy materials such as aluminum or steel. You will also want to make sure the posts are the correct height and width for your net. Most standard tennis posts are 3 inches in diameter and 42 inches tall.
Anchoring System
To keep the posts in place and prevent them from moving during play, you will need an anchoring system. There are several types of anchoring systems available, including ground sleeves, auger anchors, and weight bags. Ground sleeves are installed in the ground and the posts are inserted into them. Auger anchors are screwed into the ground and the posts are attached to them. Weight bags are filled with sand and placed on each post base.

Measuring Tape
Finally, you will need a measuring tape to ensure that the net is set up at the correct height and distance from the posts. The net should be set up so that it is 3 feet 6 inches high at the center and 3 feet high at the posts. The net should also be set up so that it is 42 feet long, with the center of the net positioned directly above the center of the court.
Choosing the Right Location for Setting up a Tennis Net
When it comes to setting up a tennis net, choosing the right location is crucial for a smooth game. Here are some factors to consider:
Surface Type
The surface type of the court is an important factor to consider when setting up a tennis net. A flat, even surface is ideal for a net to be set up on. If the surface is uneven, it can cause the net to sag or even break. Additionally, the surface should not be too hard, as this can cause the ball to bounce too high and make it difficult to play. A good option is to use a grass or clay court, as they provide an even surface and good ball bounce.
Wind Direction
Wind direction is another important factor to consider when setting up a tennis net. Ideally, the net should be set up perpendicular to the direction of the wind. This helps to reduce the impact of the wind on the ball during play, making it easier to control the ball and play a good game. If the net is not set up correctly, the wind can cause the ball to fly off course, making the game much more difficult.
Sunlight Direction
Sunlight direction is also a key factor to consider when setting up a tennis net. The net should be set up in a way that avoids direct sunlight on the players’ faces. This can be achieved by setting up the net in a way that the sun is behind the players, or by using shade structures to block the sun. Direct sunlight can be distracting and make it difficult to see the ball clearly, leading to a less enjoyable and less successful game.

Obstacles
Finally, obstacles are an important factor to consider when setting up a . The net should be set up in an area that is free from any obstacles that could obstruct play. This includes things like trees, bushes, buildings, or other structures that could interfere with the ball or the players. Additionally, there should be plenty of space around the court to allow for free movement and to avoid any accidents during play.
Setting up a Tennis Net
Setting up a tennis net may seem like a daunting task, but with the right and a little know-how, it can be done quickly and easily. In this section, we will go over the step-by-step process of setting up a tennis net, including unpacking the net, assembling the posts, attaching the net to the posts, adjusting the net height, and anchoring the posts.
Unpacking the Net
Before you can begin setting up your tennis net, you first need to unpack it. Carefully remove the net from its packaging, being sure not to damage it in the process. Lay the net out flat on the ground and inspect it for any damage or defects. If you notice any issues, contact the manufacturer immediately to resolve them.
Assembling the Posts
Once you have unpacked the net, it’s time to assemble the posts. Start by laying out all of the pieces and making sure you have everything you need. Follow the manufacturer’s instructions carefully, starting with the base of the post and working your way up. Make sure that each piece is securely fastened before moving on to the next one.

Attaching the Net to the Posts
With the posts assembled, it’s time to attach the net to them. Start by draping the net over the posts, making sure that it is centered and evenly distributed. Use the included clips or ties to secure the net to the posts, making sure that it is taut and free from wrinkles or sagging.
Adjusting the Net Height
The height of the net is an important factor in setting up a tennis court. Use a measuring tape to ensure that the net is at the correct height (3 feet in the middle and 3.5 feet at the posts). Adjust the height as needed by using the included tensioning system, making sure that the net is level and evenly tensioned.
Anchoring the Posts
Finally, it’s time to anchor the posts to the ground. Use the included anchoring system or sandbags to secure the posts firmly in place, making sure that they are level and stable. Once the posts are anchored, double-check the tension of the net and make any necessary adjustments.
Maintaining Your Tennis Net: Tips and Tricks
Tennis nets are a vital part of any tennis court, and proper maintenance is key to ensuring they last for years to come. In this section, we’ll go over some and tricks for maintaining your tennis net, including cleaning, inspecting, repairing, and storing it.
Cleaning the Net
Cleaning your tennis net is an essential part of its maintenance. Over time, dirt, dust, and other debris can accumulate on the net, making it less effective and diminishing its appearance. To clean your tennis net, follow these simple steps:
- Use a soft-bristled brush to remove any loose dirt or debris from the net.
- Mix a solution of mild detergent and warm water in a bucket.
- Dip a soft cloth or sponge into the solution and wring it out.
- Gently wipe down the net with the cloth or sponge, paying special attention to any areas with stubborn stains.
- Rinse the net thoroughly with clean water.
- Hang the net up to dry completely before storing it.
Inspecting the Net
Regular inspections of your are crucial for identifying any signs of wear and tear. This will allow you to address any issues before they become more significant problems. Here’s what to look out for when inspecting your tennis net:
- Check for any holes or tears in the netting. Small holes can be patched up, but larger tears may require a full replacement.
- Look for any frayed or damaged ropes or cables. These will need to be repaired or replaced.
- Inspect the anchor points to ensure they are secure and in good condition.
- Check the tension of the net to make sure it is taut and level.
Repairing the Net
If you do notice any damage during your inspection, it’s essential to repair it as soon as possible to prevent further damage. Here’s how to repair your :
- For small holes, use a patch kit to cover the damaged area.
- For larger tears, you may need to replace the entire netting.
- Replace any frayed or damaged ropes or cables.
- If the anchor points are damaged, replace them as soon as possible.
Removing the Net for Storage
When the tennis season is over, it’s important to store your net properly to protect it from the elements and ensure it lasts for years to come. Here’s how to remove and store your tennis net:
- Use a ladder or step stool to access the anchor points.
- Loosen the tension on the net and remove it from the anchor points.
- Roll the net up carefully, making sure not to tangle the ropes or cables.
- Store the net in a dry, cool place, ideally in a tennis net storage bag.
Tips for Setting up a Tennis Net
Are you planning to set up a tennis net in your backyard or at your local court? Here are some helpful that will ensure a smooth and successful installation.
Use a Level to Ensure Proper Height
One of the most important things to consider when setting up a tennis net is the proper height. The net should be set up at a height of 3 feet at the center and 3 feet, 6 inches at the posts. To ensure the proper height, use a level to measure the height of the posts and adjust them accordingly. This will ensure that the net is level and that the ball will bounce correctly.

Use a Tensioning System to Tighten the Net
To ensure that the net is tight and does not sag in the middle, it is important to use a tensioning system. A tensioning system will allow you to adjust the tension of the net to ensure that it is tight and level. This will also prevent the net from sagging, which can affect the trajectory of the ball.
Use Sandbags for Extra Stability
If you are setting up a tennis net in an area with high winds or on a surface that is not stable, it is important to use sandbags for extra stability. Sandbags can be placed on the base of the posts to anchor them in place and prevent them from tipping over. This will ensure that the net remains stable and in place during gameplay.
Use a Professional Installation Service for More Complex Setups
If you are setting up a tennis net in a commercial setting or in an area with complex terrain, it may be best to hire a professional installation service. A professional installation service will have the expertise and tools necessary to ensure that the net is set up properly and securely. This will also ensure that the net is compliant with all safety regulations and guidelines.
In conclusion, setting up a tennis net can be a fun and rewarding experience. By following these , you can ensure that the net is set up properly and securely. Remember to use a level to ensure proper height, a tensioning system to tighten the net, sandbags for extra stability, and a professional installation service for more complex setups. Happy playing!